Showing posts with label finished project. Show all posts

Superfast

I was planning on dubbing this the 'Superfast baby quilt' because I decided on a Tuesday that I was going to make a 'superfast' baby quilt for a baby shower that I would be attending on the upcoming Saturday. 

Fabrics & pattern selected on Tuesday

Cutting & piecing on Wednesday / Thursday

Quilt top finished on Friday

Luckily on Friday I determined that the baby shower was actually set for the following Saturday, not the very next day like I'd originally thought. Whew. Getting this quilted and bound in less than a day was really not going to happen. Especially once I started the actual quilting.
I used a pantograph I found through Urban Elementz and made sure it was a fairly simple pattern since this would be only my second time using a panto and first time on something that mattered.

Man was this a lesson in patience that I'm not sure I've successfully learned.
Starting out, I tried to give myself the benefit of the doubt but after four rows I was really bugged by how messy it looked. Like my drawings in kindergarten. Someone has to tell you its a flower for you to maybe recognize it.

So I thought, you know what, I bet I could freehand this better. Nope. Okay. I'm going to ripe it ALL out. Yeah, not so much. After ripping out my free hand attempt I was not even interested in trying to rip out the panto part. Plus seeing the repetitiveness of the pattern kind of hid the flaws a bit I think. 

Back

So I loaded it back on and started the panto again. I eventually did finish it, but it wasn't pretty. I used minky for the back and a fairly fluffy batting and I couldn't get the quilt top to lay flat. I got so many pleats & puckers on the borders it drove me crazy. I was sick of ripping out stitching so I said to heck with it and forged ahead. 


I went for a scrappy binding & decided to hand stitch it on because I wanted to be proud of at least a part of this quilt and spending some time under it made me appreciate it more than I think I would have otherwise.

Quilt Stats:
Size: 36" square(ish)
Pattern: Cluck Cluck Sew Seville
Fabric: 5 Fat quarters from my stash, 3 of which came from Stampin' Up's Twitterpated line & Joann's Minky-like fabric for the backing
Batting: Quilters Dream Puff
Thread: So Fine #50 401 - Snow


Dani's Quilt

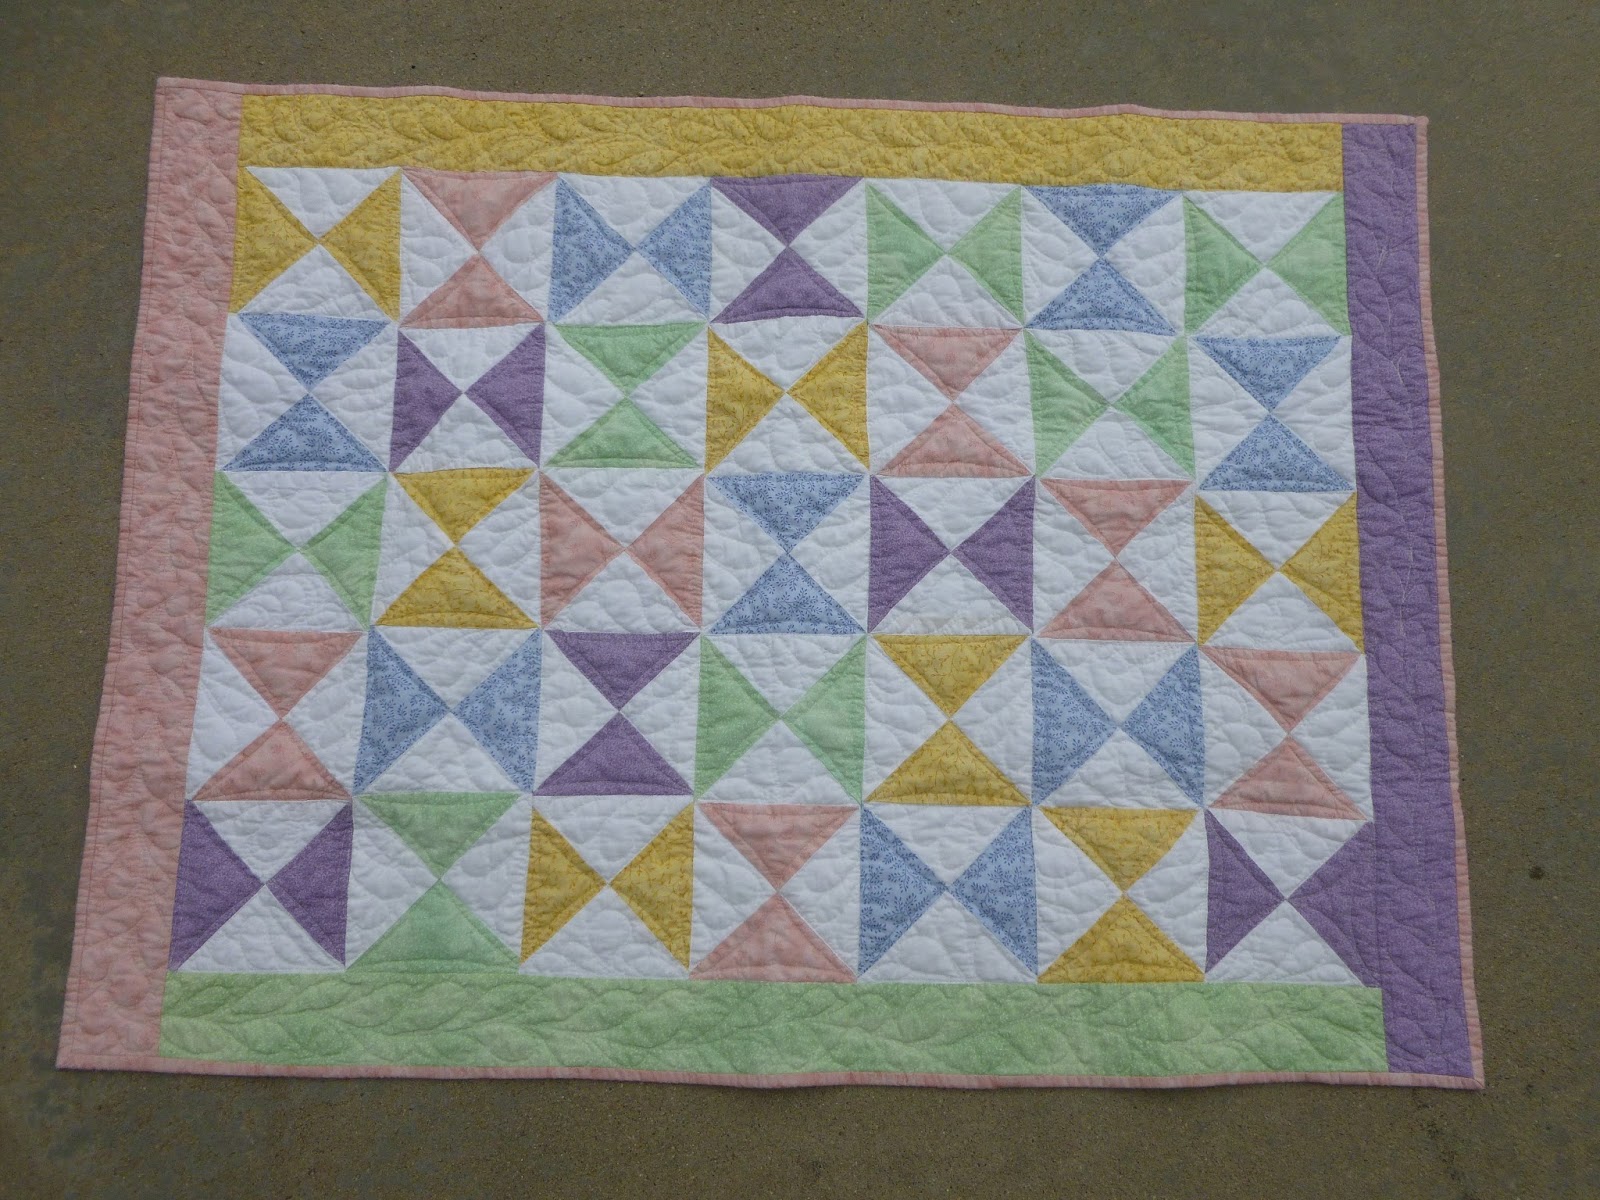
I finally got around to re-quilting my niece's quilt

Before
I took off the original borders and added slightly larger ones because they weren't in great condition after I took the original quilt apart. 

I did some continuous curves in the colored sections and then free hand feathers in the white & borders. 


After
I was hoping that I could bring out a sort of pinwheel effect. Not sure if that came across or not. 
Add caption

As I got towards the end, the yellow border was too big and I ended up getting some bunching happening. Not quite sure how to prevent that. Probably need to pay closer attention when adding borders to a quilt. This one is not remotely square since I didn't think 1/4" seams mattered back when I made the top almost 11 years ago.
Puckers, boo. 
This border turned out nicer I think.
Free hand feathers, not too shabby.


Back

 I did a newly learned technique on this one for the binding. Glue basting & ladder stitch. Holy cow was that cool. No pin sticks or aching hands and the binding looks beautiful. Looking forward to trying it on many more quilts to come.

Bound & washed
I like the wrinklyness. I hope my niece does too. She's not quite 3 yet so I'm guessing she won't have too strong of an opinion at this point. :)

Ready to go
Quilt Stats: 
Size: 42" x 31"
Pattern: Hour Glass Crib quilt from Fons & Porter's For the Love of Quilting Magazine
Fabric: purchased from local quilt shop 11 years ago
Batting: Quilter's Dream Puff
Thread: So Fine #50 401 - Snow 

Mom & Dad's Native American inspired quilt - done!

Overall I'm really please with how this quilt turned out. It's always so neat to see how quilting transforms a quilt top into something even better. I wished I could have done the curved quilting in the lighter tan areas but I didn't have a ruler big enough to span that section and free-handing it was a mess. 


Did some swirls in the light brown section, didn't turn out too bad I think. My favorite parts are in the dark brown section which I can't photograph very well.


 Even the back looks pretty neat. So they have a reversible quilt if they ever feel like it. :)

Back
Quilt stats:
Size: Queen 86" x 93"
Fabric: Various from local quilt shops & online (Stonehenge, Batik, Michael Miller - Kokopelli)
Batting: Quilter's Dream Puff 
Thread: So Fine #50 in 403-Putty, 424-Chocolate & 425-Brown Sugar
Pattern: Made up by me from a needlepoint design my mom did

Make it Right Challenge - Jacket complete!


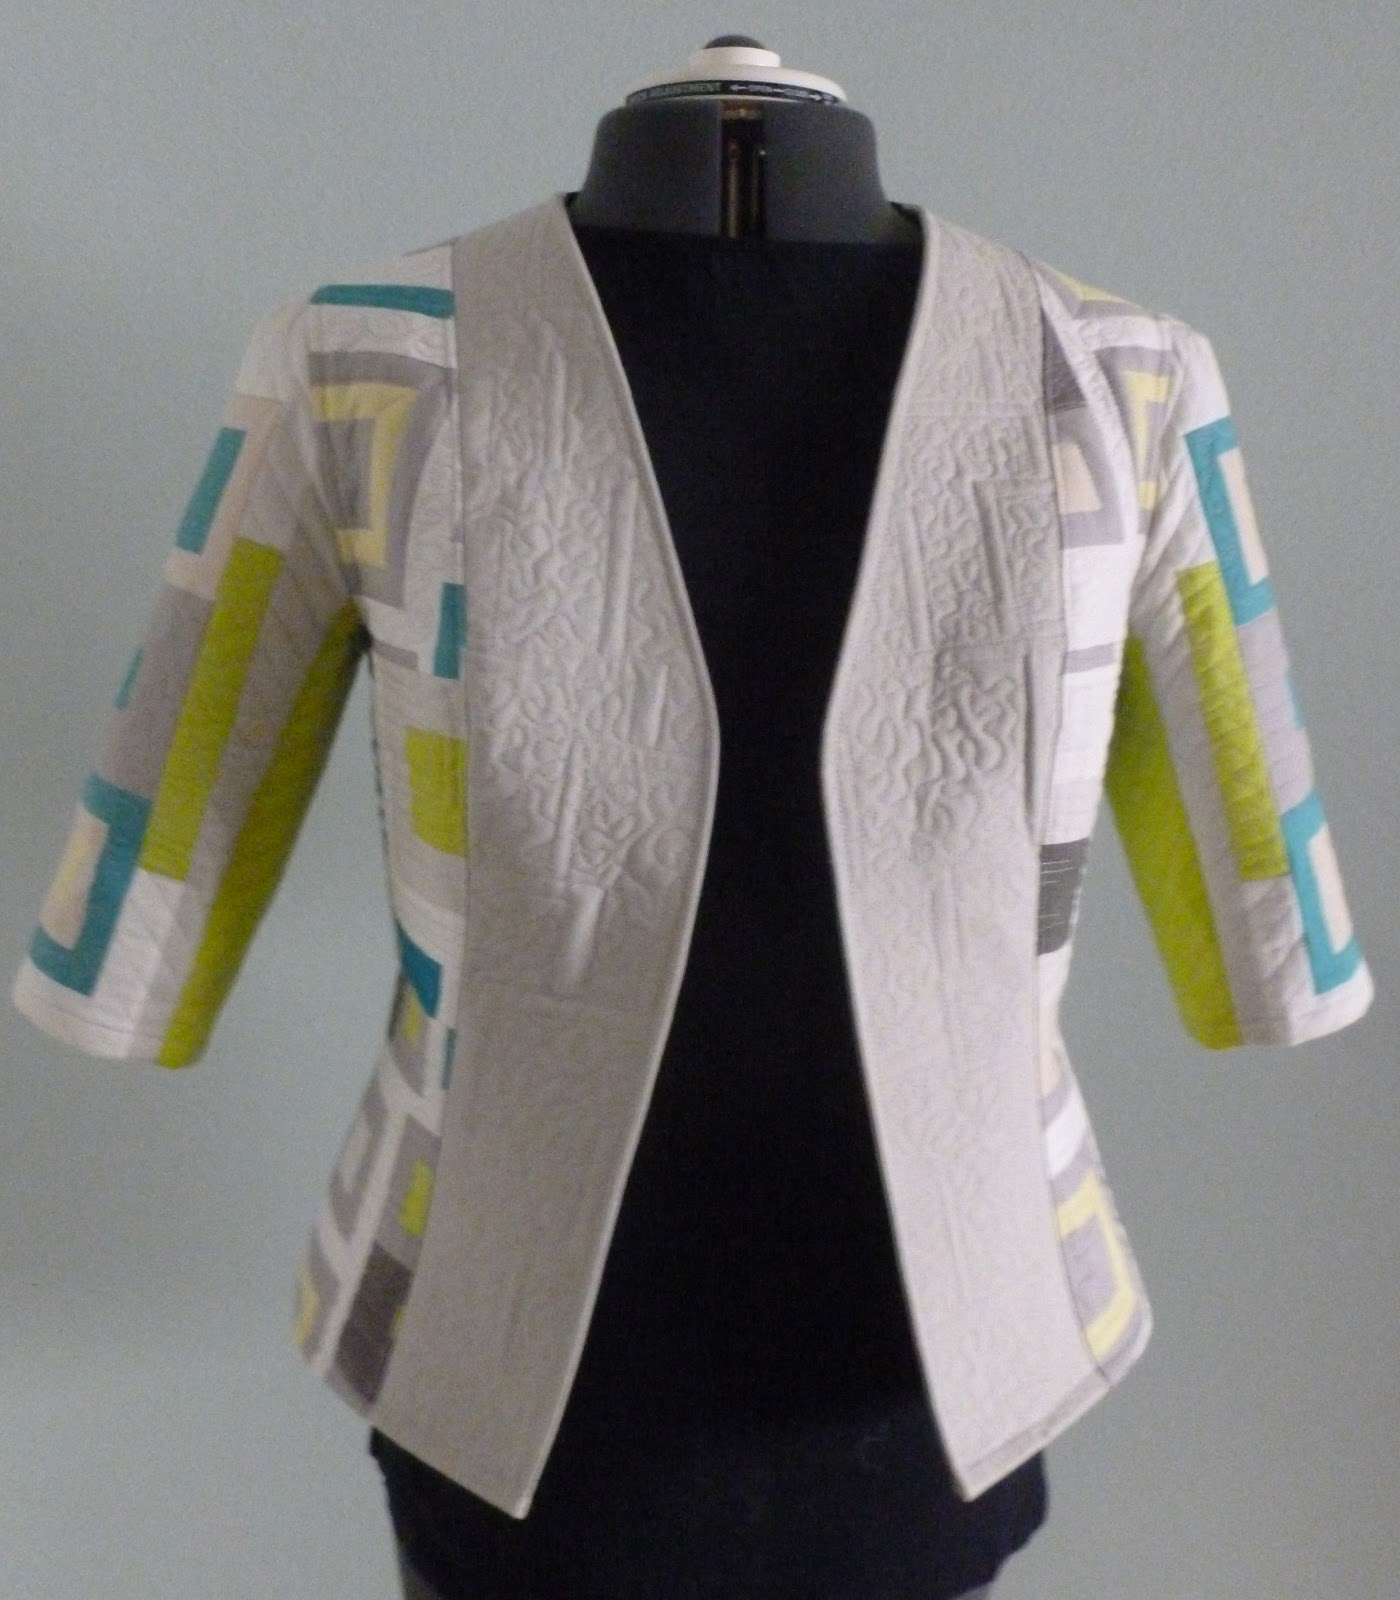
This jacket turned out pretty dang well. I'm so thrilled that I actually finished it! I'm really good at starting to sew clothes and then giving up when things get too difficult or I make a mistake. I took my time and if I started to get frustrated I simply put it down and came back to it the next day. It was awesome...and only slightly obsessive. ;)

I was going to try to make my own pattern but I just don't have the skills for that so I chose a basic jacket pattern from Vogue, V7975. I altered the sleeves so they were shorter and changed the neckline to more of a V-neck and didn't bother with a lining.

I pre-washed all the fabrics first, mainly because I somehow got a spot of oil on the panel and had to get that out so it wouldn't be a problem since I knew I needed every scrap of the panel in order to complete my project. Pinterest to the rescue...little dot of Dawn liquid soap on the oil spot and it washed right out.
I actually washed the batting too because I wanted to be able to wash the finished jacket without having to worry about crazy shrinking/wrinkles.


I split the panel up into 4 sections. 1 section for the back, 1 section for the side fronts & backs, and the remaining 2 sections for the sleeves. I did have to do some piecing to each section in order to make them big enough to cut the pattern pieces out of. I don't think you can really tell that I pieced it though by looking at it. Which is good & bad....good that it blends in, bad that it took a bit of time with no real addition to the overall look. C'est la vie. 


After getting each section pieced large enough to accommodate all the pattern pieces I quilted them on my long arm.  The under arm sections in the bright citron color I straight stitched on my regular sewing machine with a walking foot. I was really impressed with the Aurifil thread I used because I was able to use it on both my long arm & my sewing machine with no issues...and I still have a ton of it left. I think I have at least half a spool left and that's after a lot of piecing, quilting & sewing...very impressed. 

I read a Threads article that was really helpful in choosing the right batting for quilted garments. I decided to use Quilters Dream Wool because I wanted the jacket to have some structure to it.

So now I'll enter it in the Make it Right Challenge and cross my fingers. :)


Projects stats:
Fabric used: 1 Angela Walter's Right Angle Panel, Art Gallery Pure Elements in Lemonade, Mystic Gray, Light Gray, Moonstone, Midnight, Tile Blue
Pattern: Vogue 7975 - altered
Batting: Quilter's Dream Wool
Thread: Aurifil Mako 50/2 color #2600

Hubby's T-Shirt Quilt - D to the O to the N to the E

Yep, I'm a nerd. Moving on.

I actually finished this in April and forgot to add it to my 'finished projects' list.


It is now at home amongst the beagles & cats that reside on our sofa. We get to use it occasionally too. :)

Totally Groovy Crib Quilt - done!

I'm on another quilt finish high! 
I LOVE how this quilt turned out. The texture of the quilting is fantastic even if the actual quilting isn't. 


I love the the contrasting thread on the back, it looks really cool. 

boo, bird nests on the back...gotta figure out how to prevent that, it's annoying.  

Quilt Stats: 
Pattern: Carolina Patchworks - Groove; Crib Quilt - Finished Size 43" x 52" 
Fabric: Kona solids - Coal, Deep Rose & Curry
Batting: Quilter's Dream- Dream Puff 
Thread: Superior So Fine #50 ; 409 Smoke, 416 Rose Petal; 422 Mustard

A Zakka Tote

I decided to make another gift using a pattern from the wonderful book, Zakka Style. My first project using it turned out lovely and I was eager to try something else.  

I decided to go with the Zigzag Tote, the first project in the book. It didn't go quite as smoothly as I'd hoped because I was in a hurry to get it completed and I did a really dismal job at the quarter square triangles. So I whipped out some half-square triangles (of which I have gotten LOTS of practice on) and came up with this: 


Close up of quilting

Inside

I used Essex linen/cotton in Coral and a Moda Flora print left over from this quilt.  The inside was a Jennifer Paganelli print and a scrap for the pocket.  I did adjust the straps so that they were a little shorter and wider. Overall it's a really awesome bag that went together in just two days, even with the mistakes on the quarter-square triangles. I would really love to make this bag again using the double row of zigzags that are shown in the book...maybe next year I'll have to join a quarter-square triangle block of the month in order to get my skills perfected in that arena. Something new to learn, definitely open to that. 

This bag is already on its way to its new owner, my sister-in-law. I did add a note letting her know that if the color scheme wasn't to her taste I'd be more than happy to make another. It's awfully pink. Not in a bad way, just a lot of it. 

Curio quilt all done

Finishing quilts is such a high! Especially when you pull them out of the dryer all warm and snuggly. Mmmm, it's the best! All the doubt and worry about how it'll turn out disappears....at least for me. It's finished and I'm happy.

Front
I chose an all over pattern called Dusty Miller petite by Patrician Ritter of Urban Elementz

Up close front
 I used some of my half square triangles that I had left over from when I was attempting a different design for the front. I think I might actually like the back more than the front.
Back
 You can really see the lovely quilting design on the back. I used the co-ordinating green grunge and I love that it's like a solid but has some great interest.
up close back

I even hand sewed the binding down. How bout that?
hand sewn binding - woot!
 She's all ready to go to her new home.
All rolled up & ready to go

First completion of 2012

I finished my mother-in-law's Flora quilt just in the nick of time. I literately took the quilt out of the dryer and put it in our suitcase on our way out the door to the airport.  I had to wrap it in the rental car at the restaurant where her birthday celebration was.
It turned out really beautifully. The quilting was lovely and I'm really proud of the piecing I was able to accomplish.


I even added a quilt label AND the pièce de résistance was a photo of all the family members pieced together via photoshop, printed onto fabric courtesy of bubblejet and then hand-sewn onto the back. 


My 'stitch happens' moment on this quilt was when hurriedly adding the binding I had right sides together but a little twisted. Luckily it was only a few stitches to rip out and try again. Whew.